How To Build a Deck
Timber decking can be attached to a house or anywhere in the garden adding a place to escape. The level of difficulty varies depending on the location, height above ground, and load-bearing requirements. A decking can be one of four types:
- Ground Level- It is a platform that has been built into the ground.
- Raised- A platform that is less than 60cm (24”) above ground level.
- High Level- A platform that rises above the ground by greater than 60cm (24”)
- Roof Top- Existing flat roof with decking sections
Step 1- Before you build your decking
Check the intended area before you start installing your timber decking project. If you are building a decked area near a house, do not cover any air bricks or jeopardise the structure's damp-proofing properties. If you are planning to cover an urban drain, allow access to the drain after installation. If you are going to install your decking around a tree, leave plenty of room for the trunk to expand as it grows.
Is there a need for planning or building approval? It is the responsibility of the property owner to find out before work begins. Always consult with the local planning department beforehand if you are unsure.
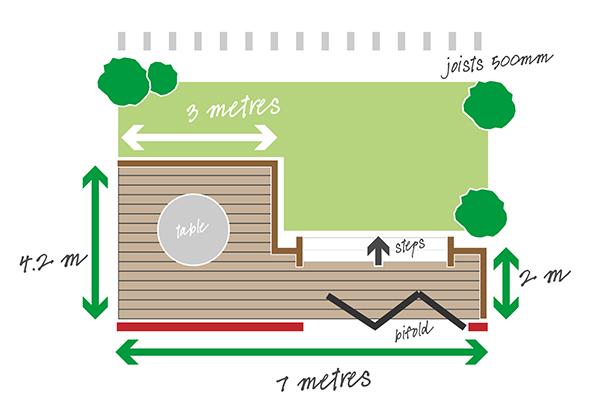
Step 2- Planning the design
When creating a decking, it is crucial to plan it thoroughly. Start by drawing a rough sketch of your decking design. You may also wish to use battens to mark the edge of your proposed deck to give you a better idea of how it will look. Decking kits are a quick and easy way to create a decking landscape. Draw a scale plan of the designated space once you have decided on the size of your decking. External house walls, wastewater soakaways, air bricks, manhole covers, door openings, and any trees or other impediments should all be marked on your plan.
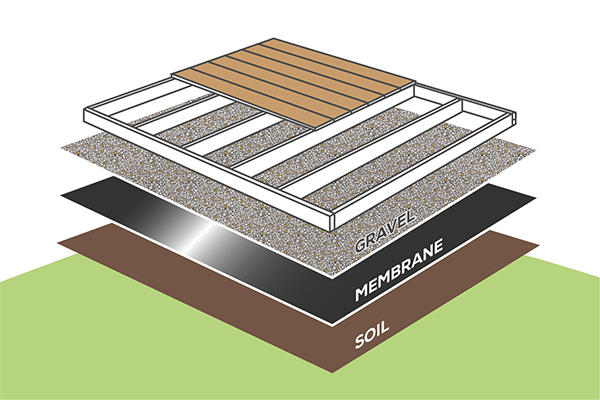
Step 3- Preparing the ground
Step 4 - Installation option
3. Begin by measuring and marking out the space for your decking from your scale plans.
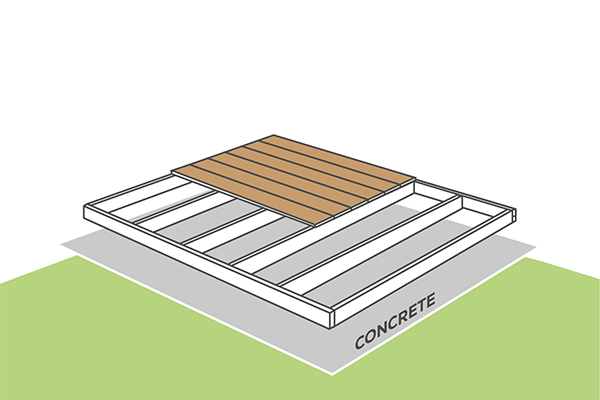
Step 5- Creating the sub-frame
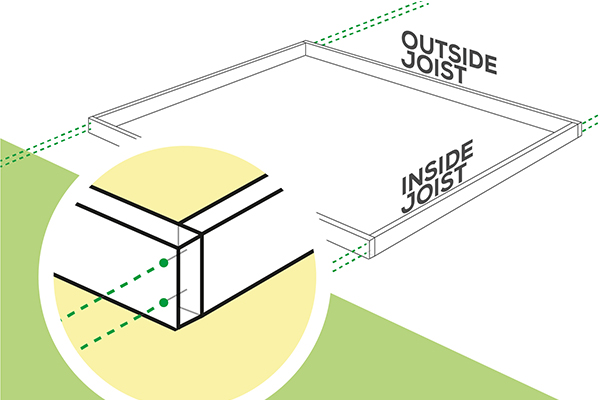
5. Using a flat wood drill bit, drill recesses into each mark. These should be the same depth as the screw head and wide enough to be tightened with a ratchet or socket attachment. This is known as a countersunk hole because it helps the screw heads lie flat with the surface.
6. Drill a pilot hole through the centre of the recess from the outer joist into the neighbouring joist with a narrower drill bit. This will prevent the timber from cracking by guiding the screws into the hole.
7. To tighten the coach screws in place, use a drill driver with a socket attachment or a socket and ratchet.
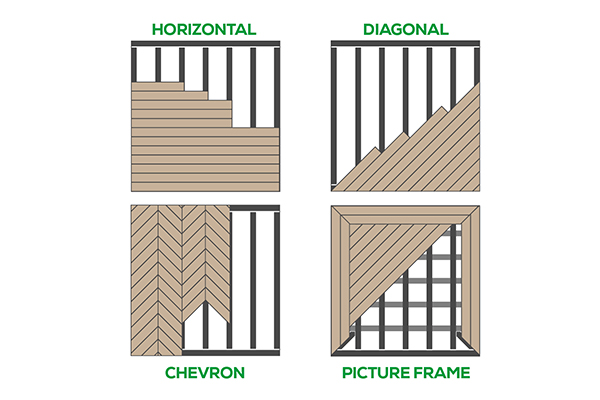
8. The number of inner joists should be determined by the design of your decking. The distance between the centres of one supporting joist and the centre of the next should be no more than 450 mm on horizontal deck boards. Joists spaced 300 mm apart are required for diagonally laid boards and chevron boards.
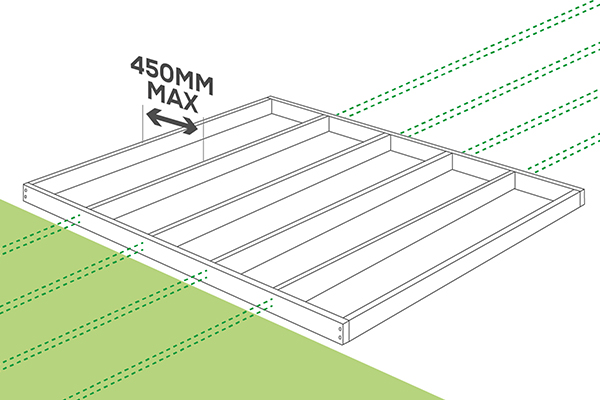
9. Now you should have a sturdy perimeter frame.
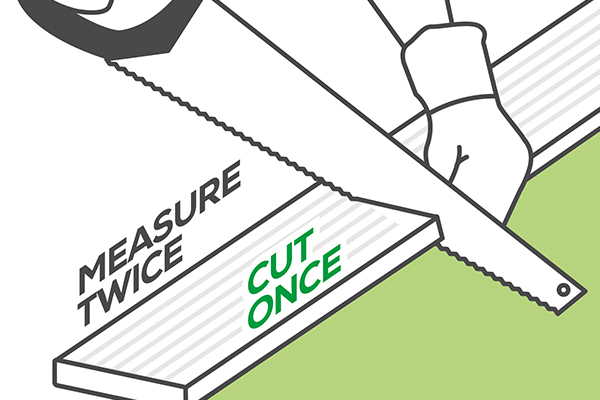
Step 6 - Cutting the deck boards
Step 7- Laying the deck boards if newel posts are installed
- Start at the outer edge of the sub-frame and move inwards, the boards must be installed in the opposite direction of the joists, so that they cross over the joists.
- Cut the board to size and fasten it in place in front of the decking posts, overhanging the sub-frame. Then trace the deck post's outline onto the decking board, to get this correct use a combination square or builder’s square.
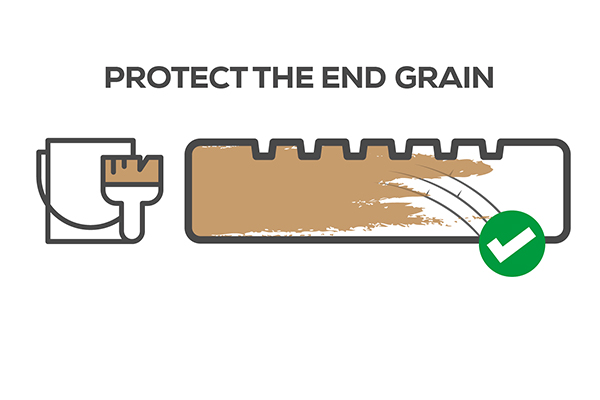
- Using a jigsaw, cut out the shape of the decking posts. Apply an end grain protection to the exposed cut end.
- The cut decking board should slot into place. Cut down its outer length if necessary to allow the inner edge to be flush with the decking posts inside edge. This will provide you with a straight edge to work with while laying the rest of your decking boards.
- Starting at one corner of your sub-frame, lay the first board across the inner joists, running in the opposite direction to the inner joists. The board must be flush against the frame.
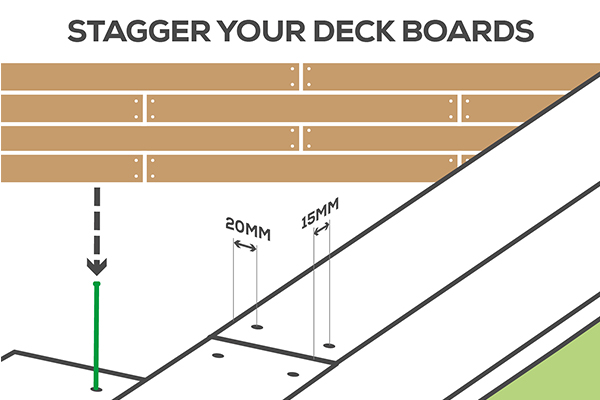
- Mark the location of the screws with a pencil. To fasten the board to each joist it crosses, use two screws on each side of the board. Screws should be at least 15 mm from the board's end and at least 20 mm from the board's outside edges.
- Drill a pilot hole through your pencil marks to guide the screws, but don't drill all the way through to the joist. Use a drill bit that is smaller than the shank of the screw because decking screws are designed to sit flush with the board, you won't need to drill a countersunk hole.
- Insert the screws into the board and tighten them. Repeat the technique with the second row, leaving an expansion gap between the boards. It's essential to stagger the boards to make your decking as robust as possible, so you may need to trim a couple to make this achievable.
Using the Camo system
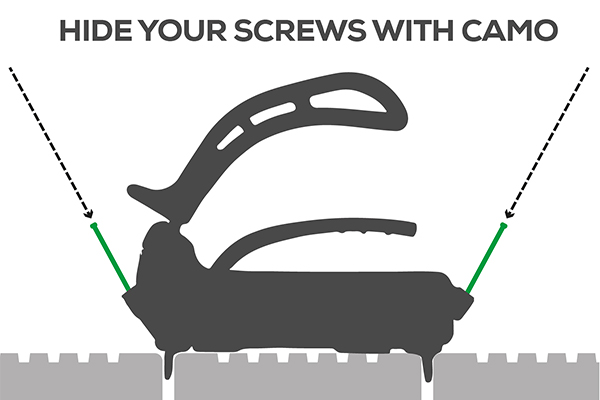
- If you use the Camo system to fix your decking boards, you don’t need to measure in from the sides of the decking boards. The Camo tool sits on top of the board and automatically sets the expansion gap between the boards every time.
- You then simply drop the specially designed screws into the angled guide holes on the tool and screw them into place. The screws are designed to pull themselves into the decking so very little pressure is needed. This means the screws are hidden on the edge of the decking board not on the face giving the decking a much cleaner finish with no visible screws. If required, the screws can be easily accessed and removed at any time in the future.
- The Camo system can be used with treated wood, hardwood, cedar PVC and composite decking.
Step 8- Finished deck
- After you've finished building your decking and installed all the boards, sand down all the cut ends with sandpaper and seal them with an end grain preserver. This prevents moisture from penetrating the wood and causing it to distort or split.
- Normally new decking is already pre-treated; simply look for a green or brown tinge, or your deck's surface will be somewhat darker than the cut end. New decking should be left alone to weather naturally allowing the decking to climatise and balance.
- After a period of 4-6 months, to apply a treatment coat, but always check the coatings manufacturers’ instructions on the product on their website.
Recent Posts
-
Forest Garden’s top tips for bringing style to small outdoor spaces
Spring is finally here, and homeowners are keen to transform even the smallest of outside areas
-
5 Creative Gravel Driveway Ideas
Are you looking to update your driveway and give your home an updated and appealing look? Look

