null

Installing decking is an excellent way to create an idyllic and social area for your garden. Decking may be independent or linked to your house, and it allows you to be very imaginative in terms of design and use. A single level deck is very simple to plan and build; however, a more advanced decking project would require elements such as balustrades, railings, and steps, making it a lengthier and more challenging.

Therefore, we've put together this useful compilation of how-tos to cover everything you would need to know to gather the most often asked decking questions (and answers) in one accessible place as the landscaping season officially begins!

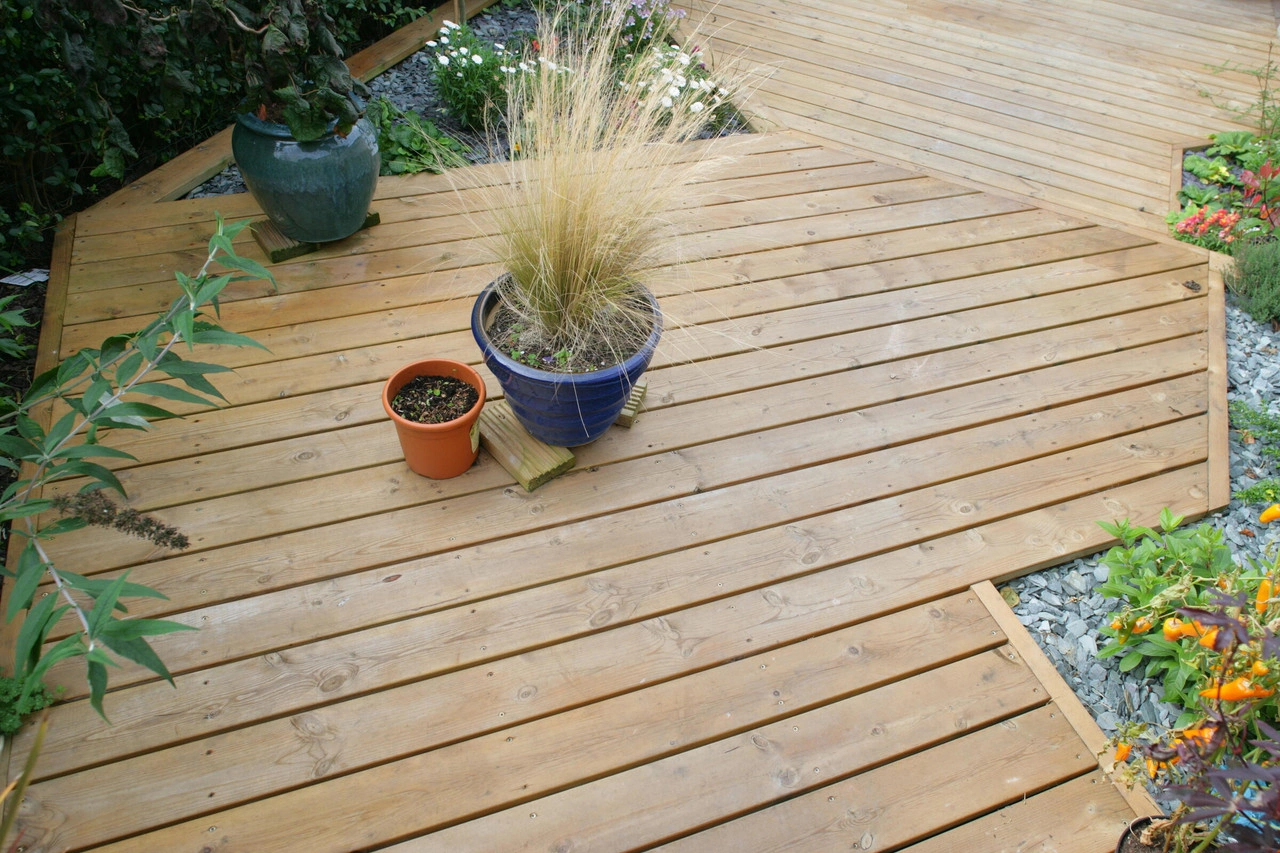
Decking in a garden with plant pots, shrubbery and grass and gravel surrounding it.

https://www.howarth-timber.co.uk/timber-decking-uc...

How to build a deck

Step 1: Before you build your decking

Knowing how to build decking is lot easier when you have all the necessary materials and designs on hand. So, if you want to create a deck from the ground up, the first thing you need do is check the planned location to ensure it meets deck installation standards.

However, there are things to take into consideration when planning an area for your decking to go. For example, do not cover any air bricks or compromise the structure's damp-proofing properties if you are constructing a decked area near a house, and make sure to allow access to the drain after installation if you wish to cover an urban drain. And lastly, if you're going to build a deck around a tree, make sure to provide enough space for the trunk to spread as it grows.

Is there a need for planning or building approval? It is the responsibility of the property owner to find out before work begins. Always consult with the local planning department beforehand if you are unsure!

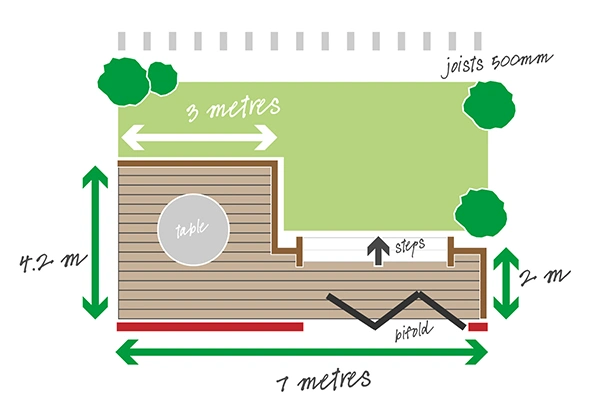
a infographic of how to build a deck, with arrows pointing up and down to show where joists should be laid

Step 2: Planning the design

It is critical to plan extensively when building a deck, so first start by sketching a preliminary design for your decking. You may also want to outline the boundary of your intended deck with battens to have a better concept of how it will appear. We also sell decking kits at Howarth, which may make the job much faster and easier. Once you've decided on the size of your decking, create a scale layout of the assigned area. Your layout should include external house walls, wastewater, air bricks, manhole covers, door openings, and any trees or other impediments.

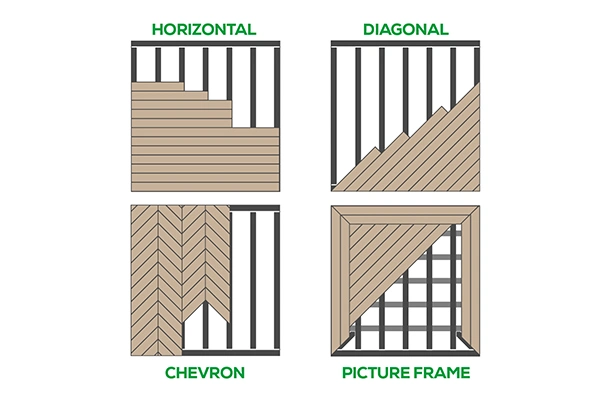
A infographic showing the different ways you can lay decking

Step 3: Preparing the ground

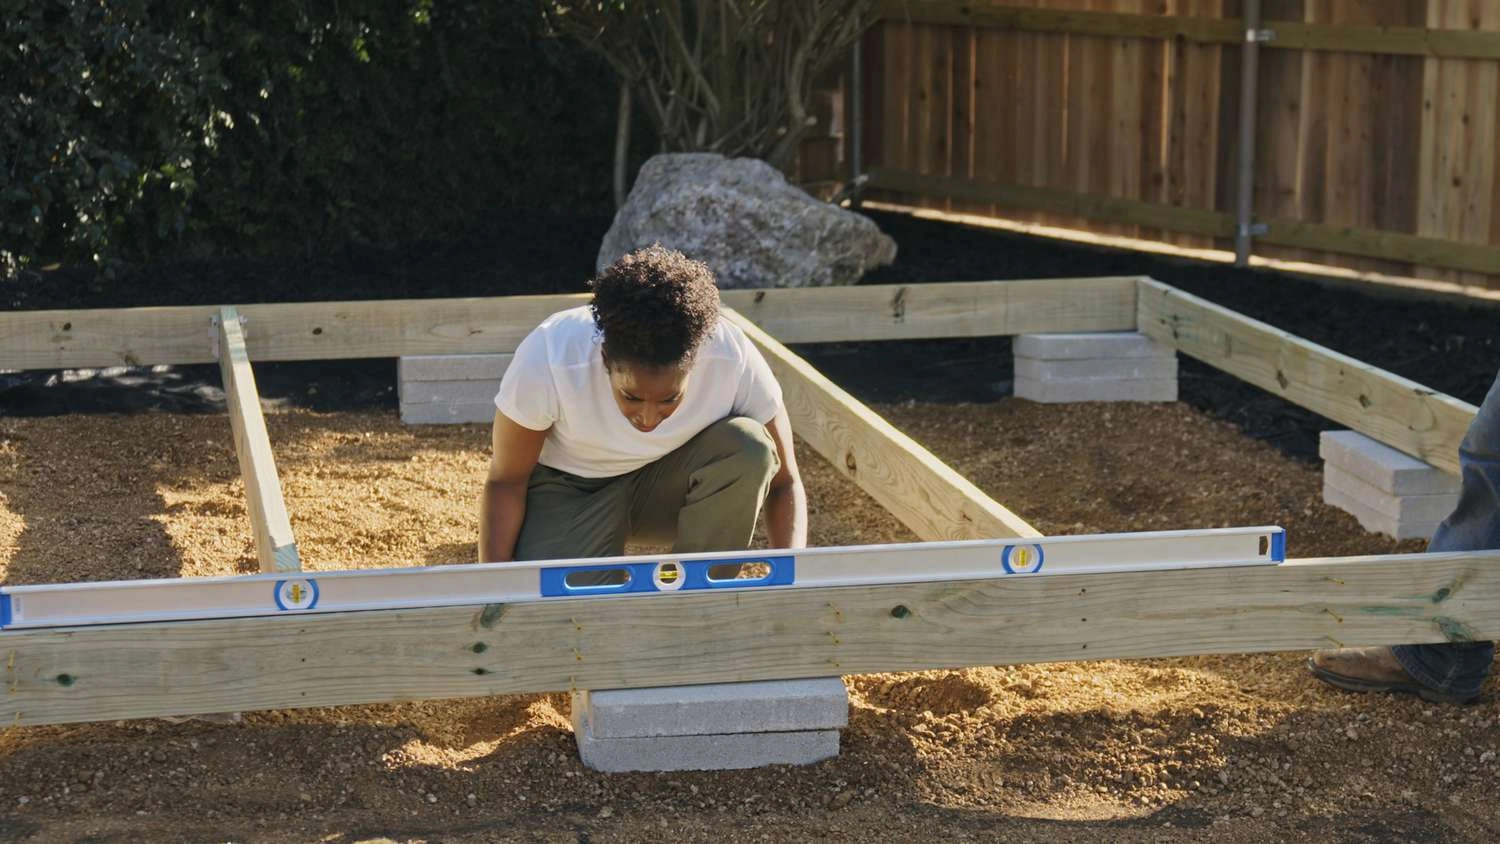
After you've completed the designs, you may begin prepping the ground. To ensure the ground is level, use a spirit level on top of a flat surface (a decking board or tamper works well). If the spirit level indicates that the ground is uneven, add extra soil or compact the area to level it.

After that, if you're building a deck on top of the grass, mark out the area for the deck and dig to a depth of 50mm and to the size you need.

A woman laying a decking sub frame over the soil in the garden and surrounded by joists

The Spruce

Step 4: Installation Option

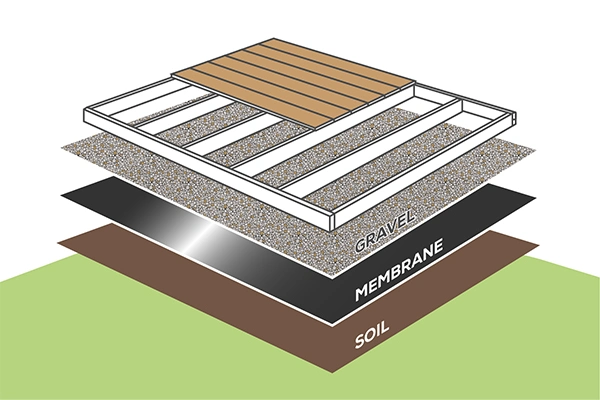
When building a deck, you have two options: place it directly on the ground (soil), or on concrete pads. If you lay it directly on the ground, it may absorb more moisture and require additional maintenance. So, if you are planning on installing your decking directly on the ground, cover the area with a layer of weed control cloth. Then, on top of it, add gravel stones with a depth of 40mm to 50mm.

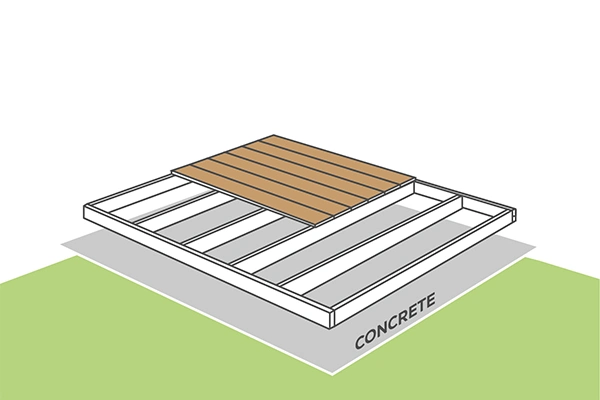
The alternative is to lay pavement first, then build the decking on top of it. Moisture will be less prone to seep into the frame and cause harm as a result. Your decking can also be placed on an existing patio or concrete basis for an even stronger foundation.

After that, you can begin measuring and marking out the space for your decking from your scale plans.

an infographic of the levels you should consider when laying decking on top of something

an infographic of how to build decking with the decking being shown to be laid on top of the gravel

Step 5: Creating the sub-frame

Before committing to a permanent project, it's usually a good idea to conduct a dry run first, as you don't want to run into any complications in the final stages of your project, such as completing the last row with a shorter length of the decking board!

  1. Start by laying down the decking boards in the desired pattern on the grass, providing adequate room between the boards for expansion (5-8mm along the length of the timer boards, and 3mm along the ends). This will then tell you whether you have enough deck to finish the job. If the wooden boards overhang the frame, keep the gap between them and the frame to less than 5mm.
  2. After measuring the frame, cut your decking to size. The number of outer joists should be four if the deck is rectangle or square, however this might vary depending on the overall deck design, such as a curved design.
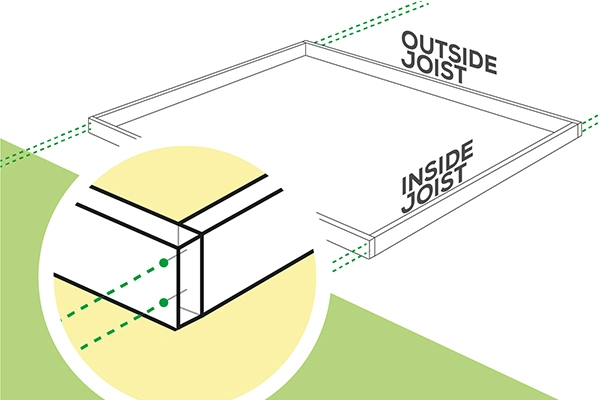
  3. Then, at right angles to the frame's inner joist, put two pencil markings on either end of the frame's two exterior joists. For a total of eight markings, two in each of the outer joist frame's corners, the marks should be aligned with the middle of the following joist.

an infographic showing the outside and inside level joists for laying decking

4. Finally, drill recesses into each mark with a flat wood drill bit. These should be the same depth as the screw head and wide enough to allow for tightening with a ratchet or socket attachment. This is referred to as a countersunk hole because it allows the screw heads to sit level on the surface. After that, and using a thinner drill bit, drill a pilot hole through the centre of the recess from the outer joist into the next joist. This keeps the wood from splitting by directing the screws into the hole.

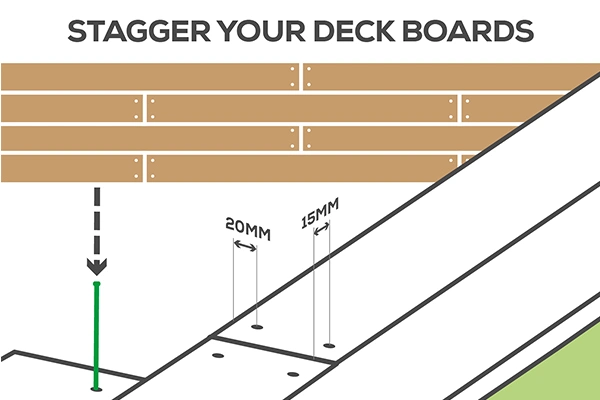
an infographic on how to stagger your deck boards when laying them to get a precise lay for the decking

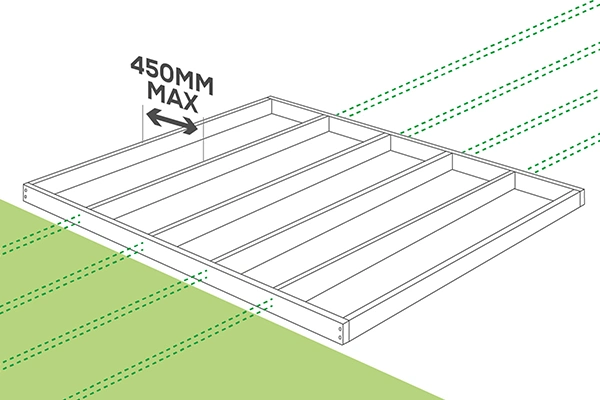
5. Finally, use a drill driver with a socket attachment or a socket and ratchet to tighten the coach screws into place. The number of inner joists should ultimately be determined by the design of your decking. On horizontal deck boards, the space between the centres of one supporting joist and the centre of the next should be no more than 450mm.

an infographic of how much space you should leave between the decking joists, with it being 450mm.

Now you should have a sturdy perimeter frame!

Step 6: Cutting the deck boards

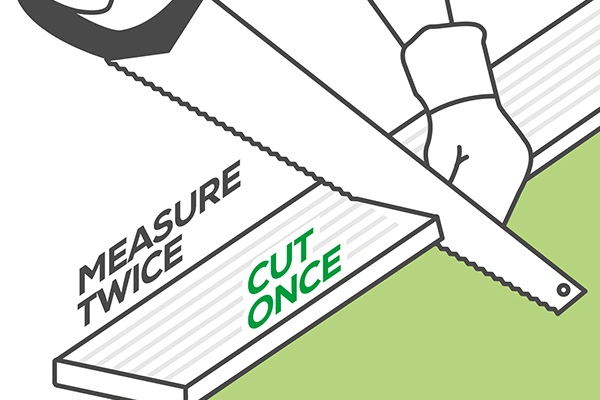
  1. Begin by measuring and marking the decking board's length. Mark an accurate line across the decking board with a combination square, then double-check your dimensions before cutting.
  2. If you're going to use a circular crosscut saw, jigsaw, or even a handsaw, attach the piece of wood to a workbench before you start sawing, but always make sure it's firmly kept in place and unlikely to move before cutting. When cutting a large or thick piece of timber, clamp a straight edge along the suggested line to ensure a straight, precise cut all the way through.
  3. Before building, treat any cut or recessed wood, such as decking boards, joists, or posts, with a protective solution.

an infographic showing how you should always measure twice, cut once, when it comes to doing any sort of project

How to lay decking

Laying the deck boards

Now you have your sub-frame and deck boards all cut and ready to finish the project, you can now begin laying the deck boards down!

  1. Start at the outer edge of the sub-frame and move inwards, the boards must be installed in the opposite direction of the joists, so that they cross over the joists.
  2. Cut the board to size and fasten it in place in front of the decking posts, overhanging the sub-frame, then trace the deck post's outline onto the decking board. To make sure this is accurate, use a combination square or builder’s square.
  3. Using a jigsaw, cut out the shape of the decking posts. Apply an end grain protection to the exposed cut end.
  4. The cut decking boards should then slot into place. Cut down its outer length, if necessary, as this will provide you with a straight edge to work with while laying the rest of your decking board.
  5. Starting at one corner of your sub-frame, lay the first board across the inner joists, running in the opposite direction to the inner joists. The board must be flush against the frame.
  6. Mark the location of the screws with a pencil. To fasten the board to each joist it crosses, use two screws on each side of the board. Screws should be at least 15 mm from the board's end and at least 20 mm from the board's outside edges.
  7. Drill a pilot hole through your pencil marks to guide the screws, but don't drill all the way through to the joist. Use a drill bit that is smaller than the shank of the screw because decking screws are designed to sit flush with the board, you won't need to drill a countersunk hole.
  8. Insert the screws into the board and tighten them. Repeat the technique with the second row, leaving an expansion gap between the boards. It's essential to stagger the boards to make your decking as robust as possible, so you may need to trim a couple to make this achievable.

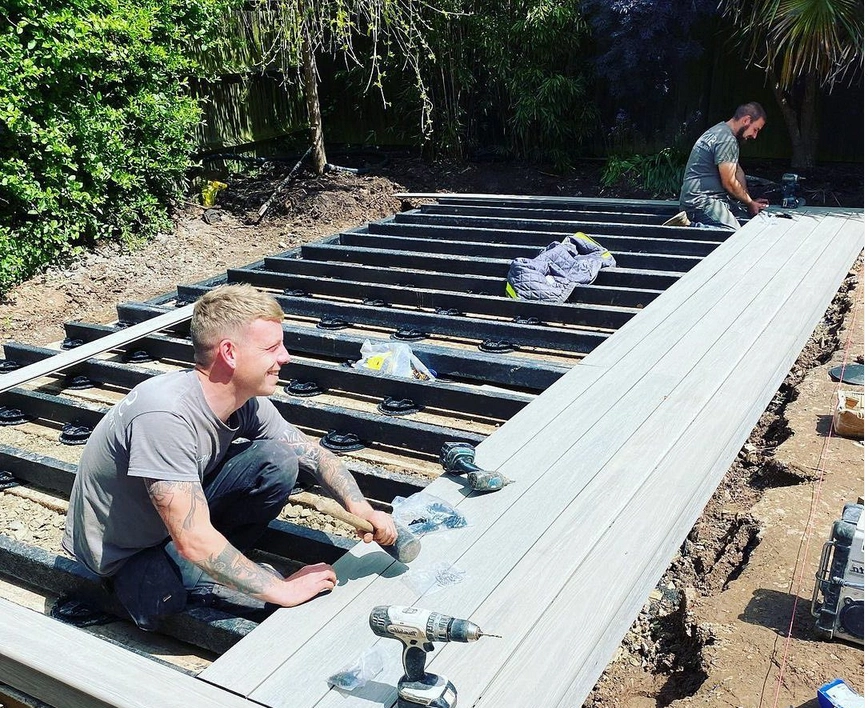
An image showing two men beginning to lay composite decking in a garden.

@envirobuild

And there you have it, a completely constructed deck in your garden!

It's critical to finish the deck to meet your requirements, so sand down all the cut ends with sandpaper and seal them with an end grain preserver. This keeps moisture from entering the wood and distorting or splitting it.

Normally, new decking is pre-treated; nevertheless, watch for a green or brown tint, or for the surface of your deck to be somewhat darker than the cut end. New decking should be left alone so that the weather may naturally climatize and balance it.

After a period of 4-6 months, you can then apply a new treatment or coat, but always check the coatings manufacturers’ instructions on the product on their website first. If desired, you may even go in with some decking paint to modify the appearance of the decking to your liking.
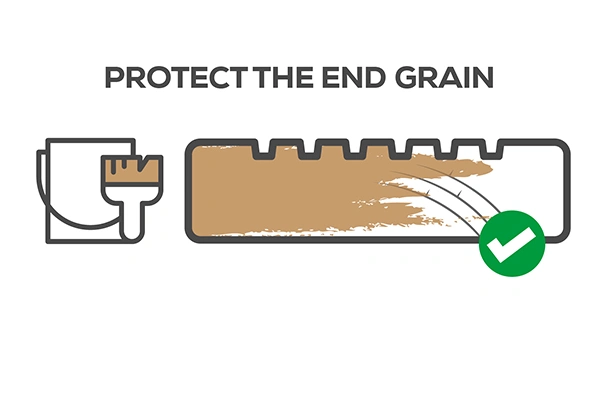
an infographic showing how you should protect the end grain of your decking, and should always maintain your decking.

How to clean decking

Once you have constructed a deck in your garden, you may find it needs special care and attention to keep it in good condition. Fortunately, deck maintenance does not have to be complicated. You can completely alter the appearance of your decking with the correct deck cleaning solutions – and keep it functional for years to come.

The first thing to understand before cleaning your decking is when to clean it. Since your deck is exposed to the elements all year round, regular maintenance is key to its longevity. Therefore, we recommend you clean your decking at least once per year. Ultimately, an annual wash can breathe new life into your deck, preserve the integrity of the wood, and ultimately help to prevent costly repairs.

A brush being used with soap and water to scrub down some composite decking to clean it.

Homebuilding & Renovating

Step 1: Prepare the area

Start by clearing everything away from the surface of your deck and remove anything that might get in your way, such as large patio furniture to small potted plants.

Next, grab a broom and give the entire decking a thorough sweep. Brush away any dust, leaves, algae, dirt, and pay close attention to any nooks and crannies where debris can collect.

Shrubbery and flowers being used to decorate a deck and fence in someone's outside garden.

Homes & Gardens

Step 2: Hose or pressure wash

After that, use a power washer or garden hose to remove any dirt or grime. To remove as much debris as possible, aim the sprayer straight at extremely contaminated areas.

Helpful tip: If you're using a power washer, take great care. When used too closely, a pressure washer may quickly damage the wood, making it considerably more difficult to clean or repair. Select the lowest setting and leave at least a few feet between the spray nozzle and the deck's surface.

After you've cleaned up the most troublesome places, spray between the decking boards to remove leftover twigs, leaves, and grass.

A jet wash being used with on decking to clean and maintain it.

Saga

Step 3: Scrub and rinse

To avoid possibly damaging your decking, create a gentle cleaning solution with warm water and liquid dish soap. Alternatively, you can use a speciality wood deck cleaner.

Dampen the surface and scrub the deck with a brush or sponge until the cleaning solution starts to lather. Let the mixture stand for 5-10 minutes (or follow the instructions on the deck cleaner label).

Then, rinse with clean water and leave the deck to dry.

A landscape image of a man using a jet wash to clean their decking in their garden, making sure to use it 2-4 feet away from the actual decking to not damage it.

Love the Garden

Step 5: Reseal

Lastly, it’s always a good idea to reseal the deck after you give it a deep clean. Some sealers may include a waterproofing agent or mildew protection, so be sure to explore your options and find the best product for your deck.

Sweep the deck once more to remove any dirt or dust that may have accumulated whilst it was drying. Then, apply the sealer according to the manufacturer’s instructions. Let the sealant dry fully before moving furniture and accessories back onto the deck.

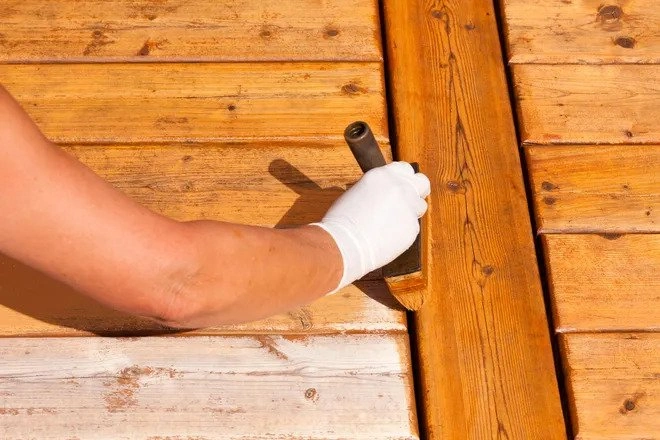
An image of a brush and sealent being used to reseal the decking once it has been cleaned.

Cjonline

How to clean composite decking

In comparison to regular decking, composite decking is much easier to clean than any other decking material. Although composite decks require little maintenance, cleaning it is essential to reduce the risk of damage and to extend its life.

This is because composite decking is made from recycled materials, wood fibres, and polymer plastics. As a result, it is significantly more durable, low-maintenance, and simple to clean than wood decking.

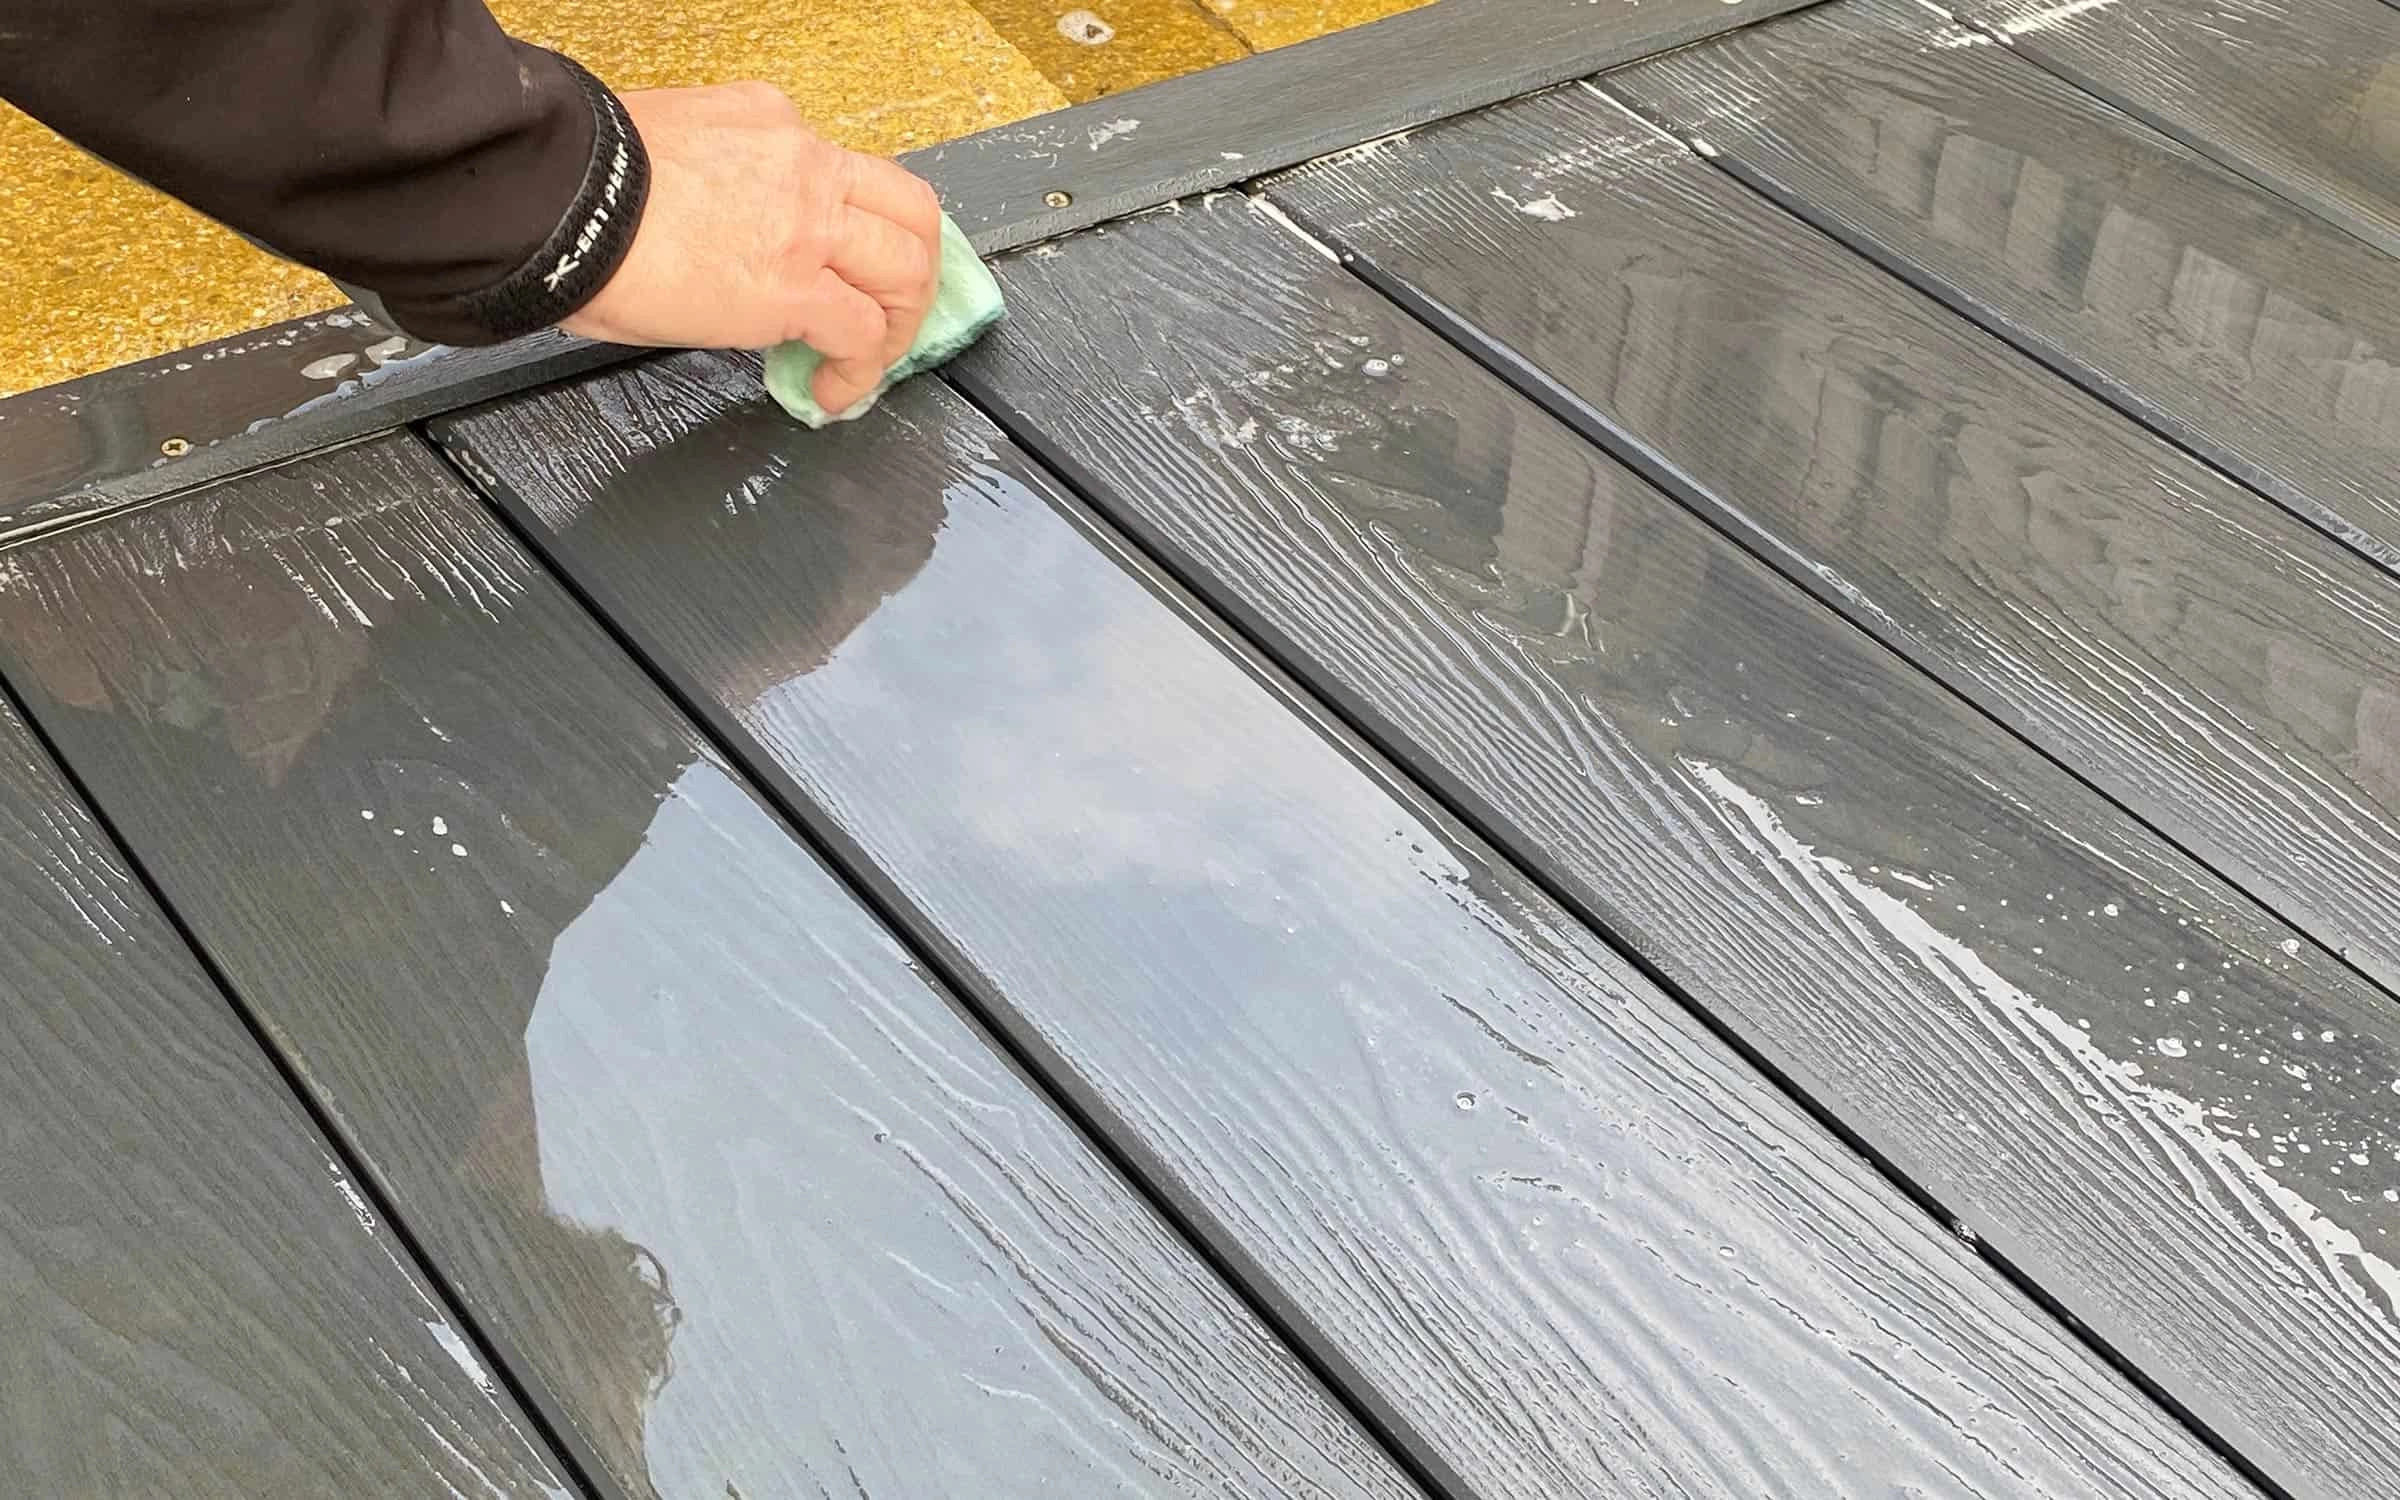
Like regular decking, you can clean composite decking by using water and soap. So, after preparing and sweeping your deck, you can concoct a soapy water solution and apply it to your composite deck boards, as this will make scrubbing and removing dirt and stubborn stains from textured composite decking boards easier. Then, using a soft-bristled brush, apply gentle pressure as you scrub away any mildew or mould.

An image of a person using a cloth and water to initially clean their composite decking so it's sparkling queen.

Neotimber

Helpful tip: If your deck receives direct sunlight, it is best to clean your composite deck in sections. The sun might dry out the soapy water, leaving behind a filmy residue.

The most critical step once you've completed cleaning your deck is to rinse away any soapy water solution. As previously said, you don't want residue on your freshly cleaned composite decking, so fully rinse it away.

You can also pressure wash composite decking, just like normal decking. However, as previously said in this article, use extreme caution and select the lowest setting.

How to lay composite decking

Installing composite decking is a simple process that depends on the area you're working with and whether you want your decking in the sun or shade. It's always a good idea to be prepared when it comes to installation, especially for composite decking.

Before you start thinking about laying composite decking, you should first think about establishing a deck structure for the composite decking. The primary framework for the composite decking subframe will be provided by rows of timber. For all-weather durability, use structurally treated timber when building a framework. However, avoid building wooden frames and joists in rainy weather since, even with treating and damp-proofing, the wood can warp and throw off your measurements.

An image of a screwdriver on top of some composite decking which has been raised by some joists in someone's back garden.

Neotimber

Step 1: Fitting the frame

  • Layout - Using string and corner markers (typically pegs), trace the perimeter of where your decking will go.
  • Level the ground - remove the topsoil and ensure a level surface - compress as needed. It's a good idea to think about how you'll build a very shallow slope for decking drainage at this point.
  • Add a layer of gravel and shingle, as well as a waterproof membrane, to prevent rainwater from penetrating the frame and weeds from growing beneath your decking.
  • Begin by cutting your treated timber into the necessary lengths to create a 'picture frame' for composite decking.
  • Assemble the frame by screwing the corners together.

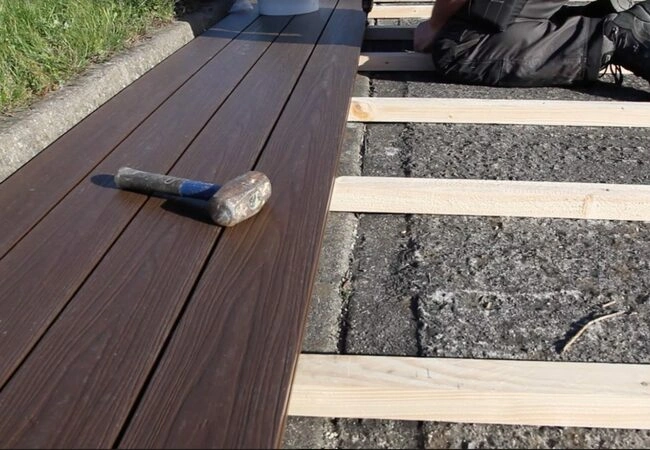
An image of a hammer left on some composite decking whilst someone lays it on top of some wooden joists above some gravel.

Housebuild

Step 2: Fitting the joists

  • Install joist hangers or cradles to keep the joists in place. Your decking boards are supported by composite decking joists.
  • Allow for expansion by leaving a little space of roughly 15mm between each joist and the timber frame.
  • Begin fastening joists to joist hangers. This can be done with galvanised nails or screws.
  • Joist spacing is determined by whether your decking planks will be set straight on or diagonally. Set your decking spacing at roughly 250mm-350mm apart for decking that runs the length of the joists. Maintain a centre joist spacing of roughly 300mm for diagonal decking.
  • Remember to treat the ends of your cut joists for complete weatherproofing.

An image of two men using a screwdriver to lay composite decking next to a house above some already laid joists.

Dura Composites

Step 3: Laying the composite decking boards

Installing composite decking is simple; simply run the decking boards along the length of the joists. These steps address clipping decking planks together; however, your decking may be installed differently. Please follow the manufacturer's instructions for further guidance.

  • Installing composite decking using clips allows you to accurately position the boards while fastening directly to the joist. Composite decking clips also serve to maintain the proper distance between decking boards, allowing them to expand and contract in response to temperature changes.
  • Attach decking clips around the edge of a wall if you've built decking against it.
  • Install decking boards along the joists, fitting the groove against the decking clips on the wall edge (if applicable).
  • Tap the decking board with a rubber mallet to ensure it's secure.
  • Allow for a tiny space between the ends of each board as they expand and contract due to changes in temperature.

An image of someone screwing in the joits that lays beneath the composite decking.

Trex

Step 4: The finishing touches

Because composite decking is made up of various fibres and might even appear hollow, cutting composite decking can result in unsightly edges that must be finished properly. This can be accomplished by building a timber frame surround or by installing composite decking fasciae.

An image of some garden furniture placed on top of some composite decking in the summer outside to show a finalised deck after it has been installed and laid and cleaned.

Savoy Timber

And this concludes the ins and outs of our Decking Ultimate Guide! If you have any questions on how to lay or clean both regular decking or composite decking or would just like to know some further information about the products we sell at Howarth, please visit your local friendly Howarth branch, or contact our customer services on the number 01472 907051.

In the meantime, you can check out our wide range of decking products on our website or Trex brand page, or you can even visit us in branch for more info.

26th May 2023 Emily Green

Recent Posts